BDD - Mastermind : View preparation to make the UI testable
This is the fourth post to create an application using BDD and TDD in iOS. If you missed the previous post, my recommendation is that you read it first here.
If you thought we were going to jump straight to BDD I’m afraid you’ll have to wait a little more. To understand it, first of all I’m going to explain which is the framework I decided to use to BDD and how does it work. With all that info you’ll understand why we need to prepare the things to be able to BDD.
You can find the code corresponding to this post in this commit. Go and get it!
Calabash
AUTOMATED ACCEPTANCE TESTING FOR MOBILE APPS
If you go to calabash web site you’ll find this definition.
Calabash enables you to write and execute automated acceptance tests of mobile apps. Calabash is cross-platform, supporting Android and iOS native apps. It is open source and free, and has a company, Xamarin, backing and developing it.
The reasons I decided to go with calabash after some investigation and research are diverse. First of all was the ease of integrating it in your projects. Opposite to other platforms it is just a question of a few sentences to be able to integrate it. Second, it works with cucumber. I really love cucumber as a way to interface with non technical people and be able to understand the same things and write acceptance criterias that we both understand and agree, and more important, we can convert them in tests.
When you are done with this post, never before ;), you can go to github calabash iOS repository and read how to install the gem and integrate it in your projects so you are able to follow the steps of this series of posts while you build your own, secure and testable app.
What’s more important to understand in this post is that calabash works with the accessibility labels to inspect and perform tasks on the simulator and the device. That’s the reason why we can’t go straight to the tests when we are going to create an app that contains a bunch of custom views and we need to see if that view is red, blue, green or yellow for example. Sadly this is something we can’t get out of the box by now. But the good news are that we can create a view that is testable in that way.
Creating Testable Views - TDD to the rescue
First thing we need to do is to convert what is a view perception into an accessible label. How are we going to do it? Keep reading and you’ll know how.
As usual we’ll start by creating a test file to test what I decided to call MMCell.
The strategy used to create a view that behaves as we want it to behave visually when we can’t test that it really happens is to break it in to parts. One is tested with TDD and ensures that when setting properties on a view the visual changes happens as we expect. The other part is that those visual changes are expressed in a simple way in the accessibility label.
To do it we’ll use two properties.
- bezierPath : This is a readonly property that will reflect the shape that is going to be drawn in the view. This we can verify what is being drawn in the view.
- color : This is a property to allow the app set the color of the circle that’s going to be shown in the view.
To better understand how we are going to make it, let’s take a look at the first test:
- (void)testWhenSizeChangesPathSizeChanges
{
    int width = arc4random_uniform(200);
    int height = arc4random_uniform(200);
    cell.frame = CGRectMake(0, 0, width, height);
    UIBezierPath *expectedBezier = [UIBezierPath bezierPathWithOvalInRect:CGRectMake(0, 0, width, height)];

    XCTAssertTrue(CGPathEqualToPath([expectedBezier CGPath], [cell.bezierPath CGPath]),
                  @"Bezier Path does not match expected shape");
}
The test is very simple. We get a random height and a random width, both between 0 and 200, and check that when we set the frame of the view the path generated matches what we expect. This doesn’t guarantees that this is what is going to be drawn. To do it we need to go one step forward.
- (void)testFillIsCalledOnBezierPathWhenDrawRectIsCalled
{
    id bezierMock = OCMPartialMock(cell.bezierPath);

    OCMStub([bezierMock fill]).andForwardToRealObject;

    [cell drawRect:cell.bounds];

    OCMVerify([bezierMock fill]);
}
This test what basically does is to check if, when drawRect is called also fill is called on bezierPath object. To do it I use one of the best friends you can have when TDDing, Mocks. Sadly this is something that is not natively implemented in XCTest, so we need to find third party developments to use it. There are different libraries that implement mocks for iOS. In this case I decided to choose OCMock which is a very well known and tested libraries, but OCMockito is also an excellent option.
Basically a mock is an object that “replaces” totally or partially the object you are trying to test or an object you want to behave in a certain way so you check what happens or make things happen in a controlled environment.
I know this sounds a little weird, so if you want me to write a full post about Mocking in iOS, please ask me for it in the comments or twitter and I’ll prepare it.
This is a good moment to introduce another player that will join you projects very often.
CocoaPods
If you are already familiar with CocoaPods you can jump straight to Testing what it looks like.
In CocoaPods Web Site they define themselves as
CocoaPods is the dependency manager for Objective-C projects. It has thousands of libraries and can help you scale your projects elegantly.
I would add to it that they do it in an awesome and very clean way.
Until I discovered CocoaPods I needed to include, organize and maintain third party developments manually. CocoaPods let’s you do it all in a very clean and isolated way so you can start using the those libraries in less than five minutes.
Let’s see how to do it in our case.
You have a very complete instruction set in CocoaPods Web Site but basically is three steps.
- Install the gem with sudo gem install cocoapods.
- Create a file named “Podfile” in the same folder you have your .xcodeproj file and include the information you need in it.
- Run pod install from the terminal in that folder.
After those three simple steps you’ll have a new .xcworkspace file with two projects in it, one your project and the other the project to build the pods library.
From this point you just need to include the pod header you need in each file you need it. In this case by now I just need to include <OCMock/OCMock.h> in the Test File.
The content of this first version of the Podfile is the following.
source 'https://github.com/CocoaPods/Specs.git'

platform :ios, '8.0'

xcodeproj 'MasterMind'

target :MasterMindTests do
    pod 'OCMock', '~> 3.1.1'
end
Note that I added the pod only to the Test target, that means this pod won’t be available in release target, which is what we want.
Testing what it looks like
We need to do the same we’ve done with bezierPath with color so we ensure that “setFill” is called on color property when “drawRect” is called on the view.
This test will make it.
- (void)testSetFillIsCalledOnColorWhenDrawRectIsCalled
{
    id colorMock = OCMPartialMock(cell.color);

    OCMStub([colorMock setFill]).andForwardToRealObject;

    [cell drawRect:cell.bounds];

    OCMVerify([colorMock setFill]);
}
At this point we know the properties are set, updated on changes, called SetNeedsDiplay to request redraw ( look at the code ) and we are sure that they are called when drawRect is called, but how can we ensure the last result is what we expect to be. There are many ways to do it so here is what I suggest in this case. Remember I’m not trying to be exhaustive in this series but create an exercise to show you all the possibilities we have so far to test an app.
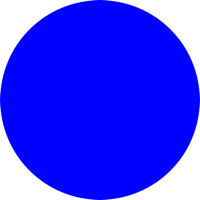
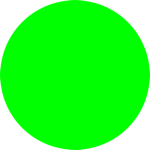
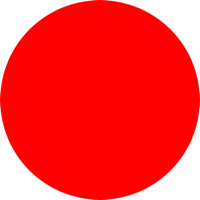
The best way to let the test see if the final result is what we want is compare it with an image that represents what we want, so that’s what we are going to do. In this case I took some images that represents what the view should look like in different circumstances. Those are:
 |
 |
 |
 |
Now, how to check the view against the image? This is the test.
- (void)testViewMatchesExpectedImage
{

    cell.color = [UIColor redColor];
    cell.frame = CGRectMake(0, 0, 200, 200);

    NSString* fileImageName = [[NSBundle bundleForClass:[self class]] pathForResource:"testImageRed" ofType:@"png"];
    UIImage *fileImageObj = [[UIImage alloc] initWithContentsOfFile:fileImageName];
    UIImage *expectedImage = UIImagePNGRepresentation(fileImageObj);

    UIGraphicsBeginImageContext(cell.bounds.size);
    [cell.layer renderInContext:UIGraphicsGetCurrentContext()];
    UIImage* image1 = UIGraphicsGetImageFromCurrentImageContext();
    UIGraphicsEndImageContext();
    UIImage *viewImage=  UIImagePNGRepresentation(image1);

    XCTAssertEqualObjects(viewImage, expectedImage, @"View should look like the image");
}
The base is that we obtain the NSData representation of both images and we compare them, that will tell us if they match or doesn’t.
And that’s all for now. Now we have testable view cells. We need testable result cells and then we can start with BDD.
Remember you can find the code of this post in this commit.
If you like it, please share! If you believe there is some part that needs more detail or want to suggest a new post like with Mocking, just send me your thoughts.
Thank you for reading me.
In the next post BDD - Mastermind : View Preparation we’ll find a more robust and maintainable way to create tests for the visual aspect.